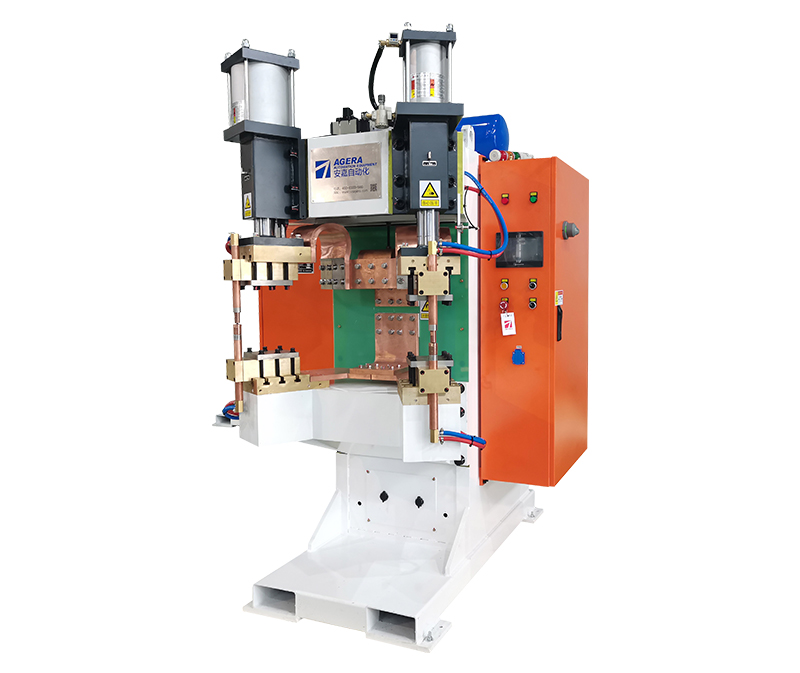
Proper assembly of nut spot welding machines is crucial to ensure their reliable and efficient operation. This article provides a comprehensive guide on how to assemble a nut spot welding machine upon delivery to the worksite, ensuring that it is correctly set up for use.
- Unpacking and Inspection: Upon receiving the nut spot welding machine, carefully unpack all components and inspect them for any visible damage or missing parts. Check the accompanying documentation to ensure that all necessary components, accessories, and tools are included.
- Base and Frame Assembly: Begin by assembling the base and frame of the welding machine. Follow the manufacturer’s instructions to securely attach the base and assemble the frame structure. Use appropriate fasteners and ensure proper alignment and stability of the machine.
- Mounting the Transformer: Next, mount the transformer onto the frame of the machine. Position the transformer in the designated location and securely fasten it using the provided mounting brackets or hardware. Ensure that the transformer is properly grounded according to safety regulations.
- Electrode Installation: Install the electrodes into the electrode holders or electrode arms as specified by the machine’s design. Ensure that the electrodes are properly aligned, tightened, and securely fixed in position. Follow the manufacturer’s guidelines for electrode selection, taking into account the specific welding requirements.
- Control Panel and Power Supply Connection: Attach the control panel to the machine frame and connect it to the power supply. Ensure that all electrical connections are properly made, following the provided wiring diagrams and safety precautions. Verify the voltage and current settings to match the power supply specifications.
- Cooling System Installation: If the nut spot welding machine has a built-in cooling system, install the necessary cooling components such as water tanks, pumps, and hoses. Ensure that the cooling system is properly connected, and all connections are tight and leak-free. Fill the cooling system with the recommended coolant as specified by the manufacturer.
- Safety Features and Accessories: Install any additional safety features and accessories that come with the machine, such as safety guards, emergency stop buttons, or light curtains. These safety components are essential for protecting operators and preventing accidents during machine operation.
- Final Checks and Calibration: Before using the nut spot welding machine, perform a final inspection and ensure that all components are properly assembled and secured. Check for any loose fasteners or connections and tighten them if necessary. Calibrate the machine according to the manufacturer’s instructions to ensure accurate and consistent welding performance.
Proper assembly of a nut spot welding machine is crucial for its safe and effective operation. Following the outlined assembly guidelines ensures that all components are correctly installed, electrical connections are properly made, and safety features are in place. By meticulously assembling the machine and adhering to the manufacturer’s instructions, you can set up a nut spot welding machine for optimal performance and achieve high-quality welds in your applications.
Post time: Jun-19-2023


